Hey there, long time no see! Thanks for coming back and giving this recipe a read. This recipe is a tried and tested favourite of mine, so I hope you enjoy! Cinnamon buns were a late discovery for me in my culinary journey. These fluffy, chewy buns of goodness managed to elude me until my late teens. Since I tried my first one, I’ve been hooked. You see I am a bit of a cinnamon fiend, in my personal opinion you can never have too much cinnamon. To me, this delicious spice is akin to having a warm hug from Christmas. There are a variety of ways to make and enjoy cinnamon buns, so this recipe is a one stop shop for all of your questions.
Makes: roughly 24 buns, to fill 2x 9″ cake tins
Ingredients:
Dough:
- 240ml x milk of your choice (I used oat milk),
- 135g x caster sugar,
- 14g x dried yeast,
- 560g x plain flour,
- 2x large eggs,
- 115g x unsalted butter,
- 1 tsp x salt.
Filling:
- 100g x unsalted butter,
- 100g x caster sugar,
- 2 tbsp x ground cinnamon,
Milk Glaze:
- 5 tbsp x icing sugar,
- 2 tbsp x milk of your choice ( I used oat milk),
- 1x lemon zested,
Cream Cheese Icing:
- 240g x cream cheese,
- 100g x icing sugar,
- 1 x lemon zested.
- Firstly, the milk needs to be slightly warmed. This can be done in the microwave, although I think doing this in a pan is much easier to gauge the heat of the milk. You don’t want to heat the milk more than 38 degrees, you can easily test this by sticking your clean finger into the milk to test the temperature. You should be able to comfortably hold your finger in the milk. It shouldn’t feel cold or hot. Once the milk is at this temperature, add your instant yeast and 3 tablespoons of caster sugar. Leave this to the side for the yeast to activate.
- Next, in a large mixing bowl you should combine the flour, salt and sugar. Make a well in the middle of your flour mix and add the eggs and butter. If your milk mixture looks foamy add this too.

3. To begin creating your dough you’re going to want to use a wooden spoon as the dough is quite wet. However, after all the flour has been mixed in you can start to mix with you hands. Once the dough starts to come away easily from the sides of the bowl, lightly flour your kitchen surface and tip the dough out.
4. Knead the dough with the palm of your hands, pushing it away from you, while stretching it out. Ensure to add more flour if needed and to regularly turn your dough to make sure it doesn’t stick to the table. Knead your dough for around five minutes. Once you’re finished kneading your dough should have a smooth, shiny surface. Lightly oil a bowl and transfer your dough into it. Cover with clingfilm or a tea towel and leave in a warm place to prove for two hours, or until the dough has doubled in size.
5. This part isn’t really a step but some fun science to explain proving. Yeast is a single celled micro-organism (which is technically part of the fungus family). Yeast likes to feed on sugar/starch at their optimum temperature of 38 degrees Celsius. Alcohol and carbon dioxide is a by product of this process. This is called fermentation. When your dough proves, the yeast feeds on the sugars and starches in your dough and produces carbon dioxide which helps your dough to rise. The yeast is then killed off when put in to the oven. We have yeast to thank for many wonderful things such as: bread, alcohol and some cakes. Thank you yeast!
6. Now for the fun part. Is life getting you down? Work stressing you out? Well fear not readers! Simply find some well proved dough and punch it. You read that right, punch the dough. This method is called knocking back, you want to take all of the carbon dioxide out of the dough.

7. Once you have successfully punched your manager – I mean dough – in the face, tip it out on to a lightly floured surface. Using a rolling pin, roll your dough into a large rectangle that is a centimetre thick. If when you stretch your dough it keeps shrinking, cover your dough and leave for ten minutes to continue proving.
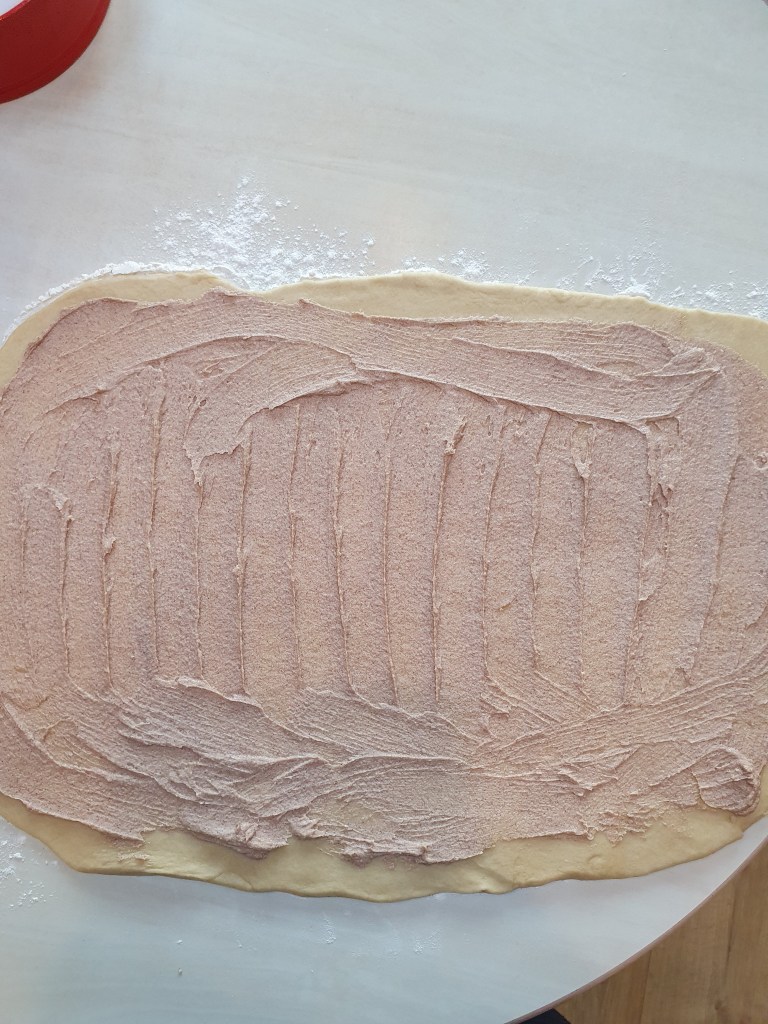
8. In a separate bowl make your filling. Combine your softened butter, sugar and ground cinnamon. Once this has all been mixed together, spread this mixture over your rolled out dough.
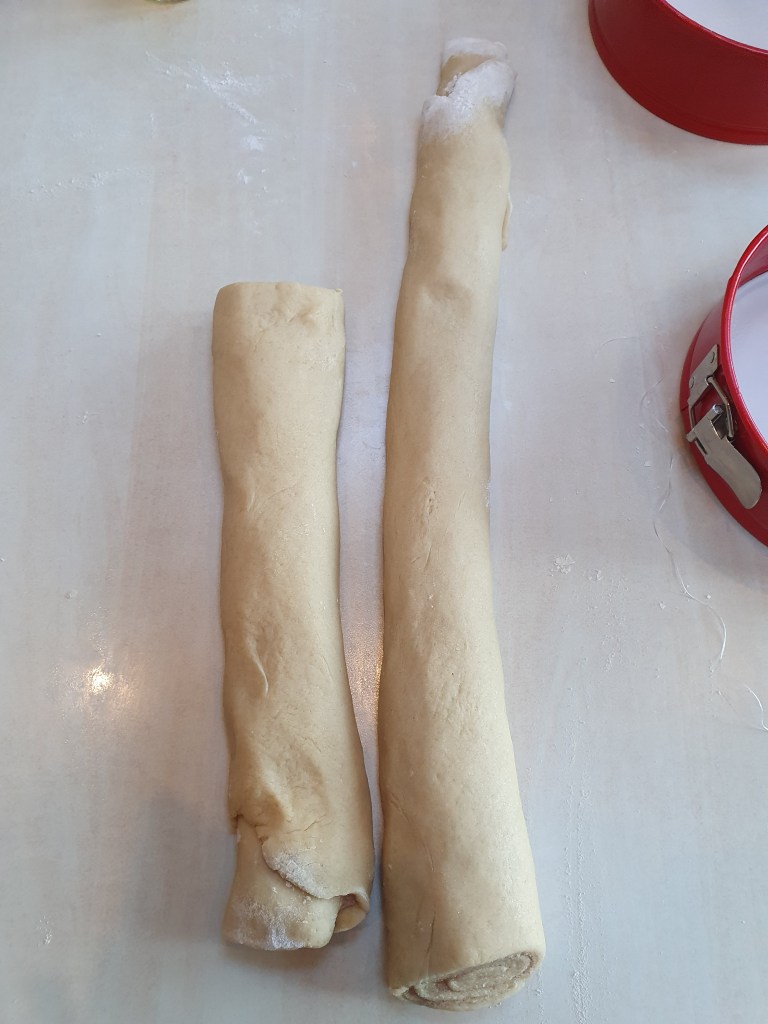
9. Now to create the signature cinnamon bun swirl. Take the long edge of your rectangle of dough and create a small fold along this edge, around half a centimetre thick. This initial fold will make it is easier for you to roll your dough. Now keeping your dough tight carefully roll your up your dough into a long sausage.
10. Now for a handy cinnamon bun hack. If you were to cut these with a knife it would most likely squish the lovely spiral you’ve just made. So instead grab some floss from your bathroom. Cut off roughly a 15cm length of floss, take an end in each hand and shimmy the length under the cinnamon roll sausage. Measure out roughly half an inch and cross your two hands over, creating a loop. Pull the strings to cut the cinnamon rolls. This keeps your spiral from diminishing. Your welcome!

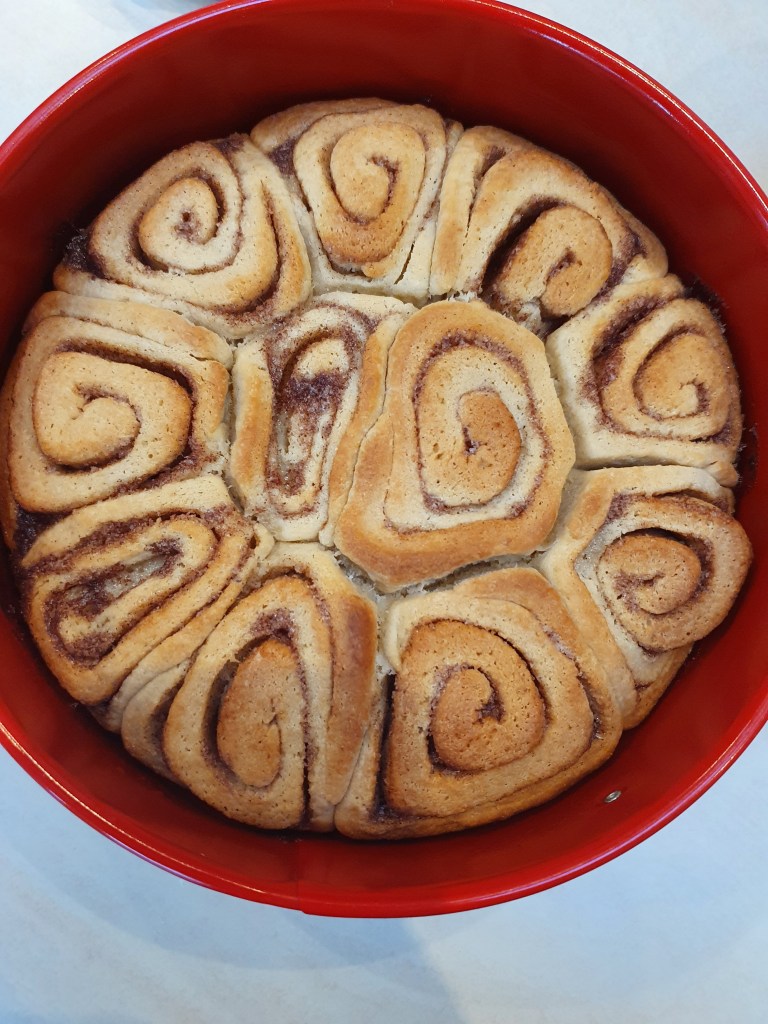
11. Next arrange your cinnamon buns into your greased tins. I used 9″ cake tins, however, you can use a ceramic dish or baking tray. Be careful when handling your buns as the dough is very soft. Once safely in your dish, cover with cling film or a tea towel and leave to prove in a warm place for a hour.
Alternatively:
12. Once your buns are placed into their greased tray, cover them with cling film. They can prove in the fridge overnight. This may not be the yeasts optimum temperature but the yeast will continue their fermentation very slowly.
13. Once your proving is complete pre-heat your oven to 180 degrees Celsius. Once your oven is up to temperature, pop your cinnamon buns in the oven for 30 minutes. If you feel the buns are browning too quickly, cover them with foil. While the buns are cooking you can prepare your icing.
There are two icing recipes depending on your preference of icing, so use whichever topping you like the best. Or both, you’re an adult, I can’t make those decisions for you.
Milk Glaze:
14. In a small bowl mix the icing sugar and lemon zest together. After fully combined gradually add in your milk, mixing constantly to avoid lumps.
Cream Cheese Icing:
15. In a bowl add your cream cheese and lemon zest, mix until combined. Once incorporated, sift in your icing sugar gradually.
16. Once your cinnamon buns are cooked they should be golden brown and firm to the touch. Take them out of the oven but leave them in the tin to cool.
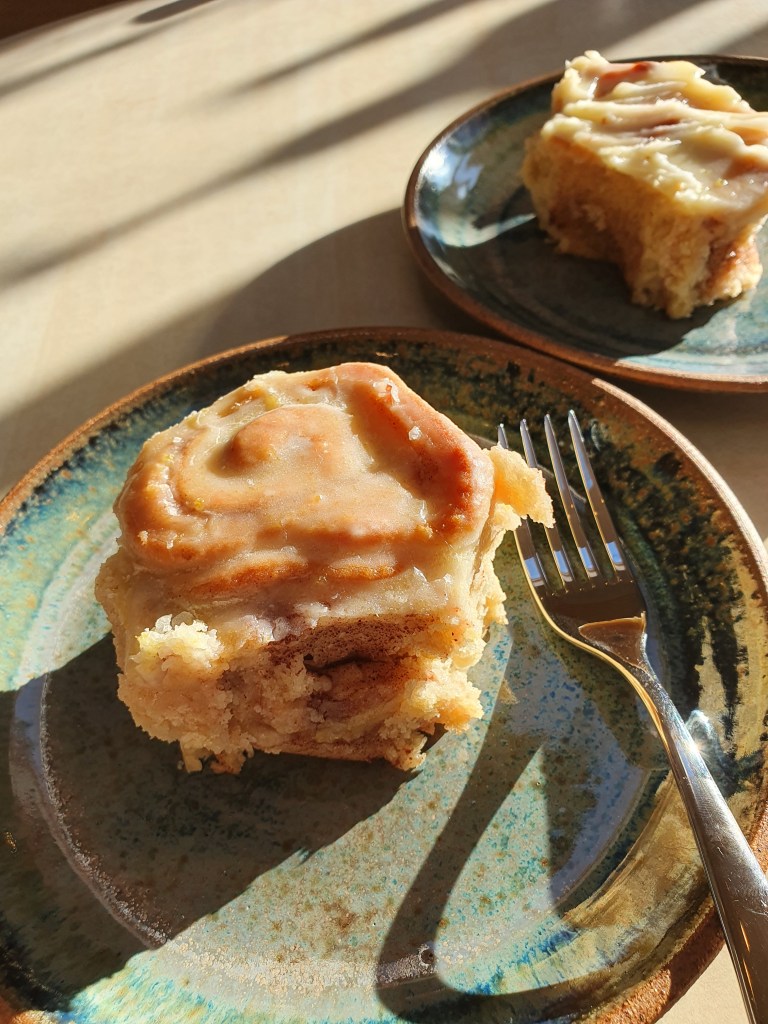
17. While still warm, top with your icing of choice and leave to cool. The milk glaze will absorb into all of the crevices of your buns and create a zesty sheen. Whereas, the cream cheese icing will provide a thick layer of tart freshness to combat the sweetness of the bun.
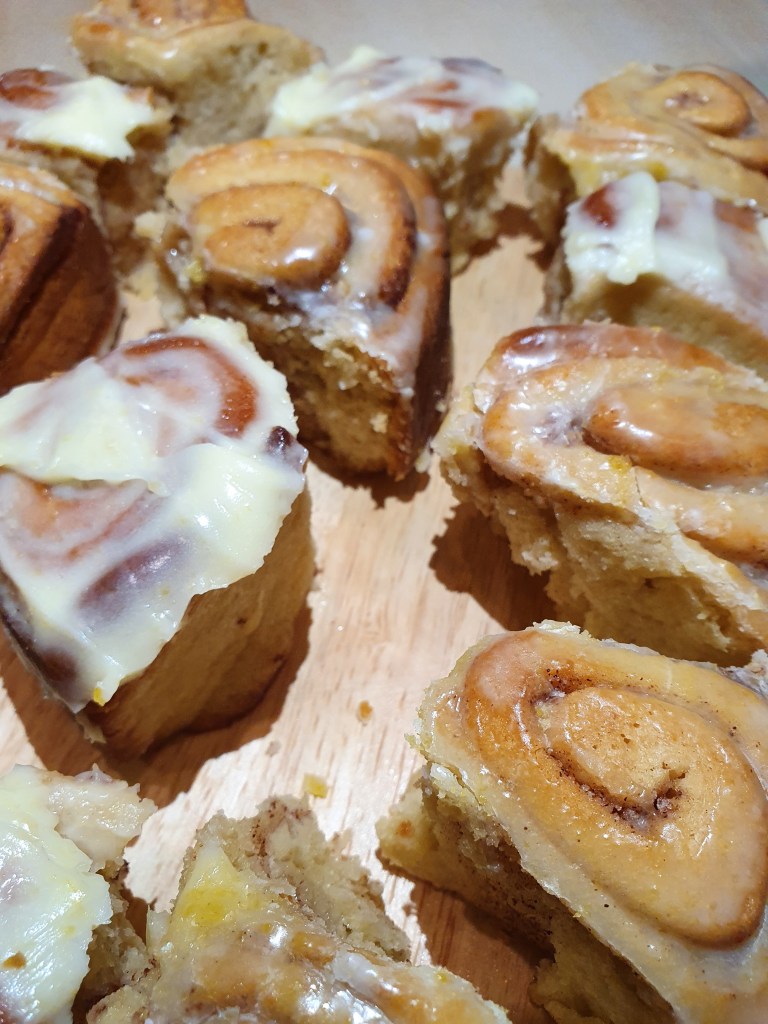
These cinnamon buns are best enjoyed warm and shared with friends. Best to be eaten within 3 days, after that they can be used as weapons to attack your siblings. If you’ve enjoyed this recipe feel free to share it with your family and friends. Drop a comment down below if you’ve been brave enough to try double icing your cinnamon buns and tell me your thoughts.
